Monday 31 May 2010

Memory Game

In this project, we are going to create a memory game. I think there are three steps of creating a memory game.

Step 1 : Create the form / user interface

Step 2 : Set the properties of the components

Step 3 : Write the code

Step 1 : Create the form / user interface

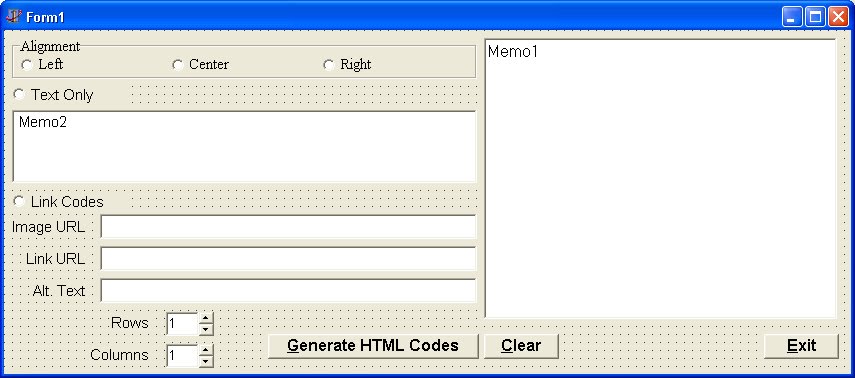
First you have to create a form with some image components, a label, a start button, a  timer and an exit button. You can set any width or height properties of your components you use. And arrange them like the picture below or you can use your own arrangement.

Then cover all images with buttons. So your form will be like this :

Step 2 : Set the properties of the components

Now, set the properties of all components we use in this project like tables below :

Form

PropertyValue
CaptionMEMORY GAME
Position

poDesktopCenter

Buttons

ComponentPropertyValue
StartButtonNameStartButton
Caption&Start
ExitButtonNameExitButton
Caption&Exit
Button1 .. Button20Caption?

Label

PropertyValue
CaptionMEMORY GAME

Images

PropertyValue
Stretchtrue

Timer

PropertyValue
Interval1000
Enabledfalse

Step 3 : Write the code

Before we start writing the code, we need to prepare some pictures for this project. I have prepared 30 pictures that you can download (jpg format). Or you can have your own pictures. If your pictures are in jpg format, you have to declare it in the uses clause.

uses

  Windows, Messages, SysUtils, Classes, Graphics, Controls, Forms, Dialogs, StdCtrls, ExtCtrls,       jpeg;

To see the complete code, you can download this project here.

Friday 28 May 2010

Example program of using BinaryToInteger.DLL

In this example, we are going to create a program that can convert an eight binary data into an integer value using BinaryToInteger.DLL. Before we start, you have to create a user interface like this picture.

Every edit box holds a bit of binary data. So there is a byte binary data (8 bits) that will be converted into an integer value. A binary data holds ‘0’ or ‘1’, so we need to limit the input of each edit box. And the code will be :

procedure TForm1.bit8KeyPress(Sender: TObject; var Key: Char);
begin
  if not (key in ['0','1',#8,#13]) then 
    key:=#0
      else
        bit7.SetFocus;
end;

To use BinaryToInteger.DLL, you must declare the function after {$R *.DFM}

{$R *.DFM}
function BinToInt(S : String): integer; stdcall; external 'BinaryToInteger.dll';

Don forget, you must place your BinaryToInteger.DLL in the same folder with this project, or you can place this DLL file in the directory : c:\windows\system.

The code of OnClick even of ConvertButton :

procedure TForm1.ConvertButtonClick(Sender: TObject);
var
  BinaryData : string;
begin
  BinaryData := bit8.Text + bit7.Text + bit6.Text + bit5.Text +
  b it4.Text + bit3.Text + bit2.Text + bit1.Text;
  IntegerValue.Caption := IntToStr(BinToInt(BinaryData));  
end;

You can download the complete code of this example program here.

BinaryToInteger.DLL

Now, we're going to create a DLL file named BinaryToInteger.DLL This DLL is for converting “a character string of binary” into an integer value.

Example :

‘11111110’ = 254

The complete code of BinaryToInteger.DLL (click to download)

library BinaryToInteger;

uses
   SysUtils,
   Classes;

{$R *.RES}

function BinToInt(S : string) : integer; stdcall;
var
  DataLength, i, j, buffer, buffer1 : integer;
begin
  DataLength := Length(S);
  buffer1 := 0;
  for i := 1 to DataLength do
    begin
      buffer := StrToInt(S[i]);
      for j := 1 to DataLength-i do buffer := buffer*2;
      buffer1 := buffer1 + buffer;
    end;
  BinToInt := buffer1;
end;

exports
  BinToInt;

begin
end.

To use this DLL file, you can see the example of using BinaryToInteger.DLL

Wednesday 26 May 2010

Dynamic Array

Dynamic array is an array that has no fix amount. To declare a dynamic array you can use this syntax :

Array of datatype;

Example :

    Var

       MyArray : array of integer;

This array is dynamic with integer data type. The memory of array is not allocated. To allocate memory of array use SetLength procedure.

Example :

    SetLength(MyArray, 5);

    SetLength(MyArray, 2, 3);

    SetLength(MyArray, 2, 3, 5);

It will allocate an array which has five elements. In this case the index will be 0, 1, 2, 3, 4. And to free the array memory, set nil value to the array. 

Example :

    MyArray := nil;

Example program :

program Project1;
{$APPTYPE CONSOLE}
uses
   SysUtils;

var
   i, sum : integer;
   MyArray : array of integer;
begin
  SetLength(MyArray, 5);
  MyArray[0] := 12;
  MyArray[1] := 14;
  MyArray[2] := 16;
  MyArray[3] := 18;
  MyArray[4] := 20;
  sum := 0;
  for i:= 0 to Length(MyArray) -1 do
   begin
     sum := sum + MyArray[i];
   end;
  writeln(sum);
  readln; 
end.

You can download the complete code here.

Tuesday 25 May 2010

3-Dimensional Array

3-dimensional array is an array that has three indexes. To understand the concept of 3-dimensional array, see the picture below.

To declare 3-dimensional array that can hold 24 character, we can us this statement :

Type

    TwoDimensionalArray = array[1..2, 1..3, 1..4] of char;

Var

    TheData : TwoDimensionalArray;

Or you can use this statement :

Var

    TheData : array[1..2, 1..3, 1..4] of char;

To access an element in 3-dimensional array use this syntax :

ArrayVariableName[ArrayIndex1, ArrayIndex2, ArrayIndex3];

Example :

TheData[1,3,4] := ‘A’;

Writeln(TheData[1,3,4]);

Readln(TheData[1,3,4]);

Example :


program Project1;
{$APPTYPE CONSOLE}
uses
   SysUtils;

var
   i, j, k : integer;
   Thedata : array[1..2, 1..3, 1..2] of char;
begin
  TheData[1,1,1] := 'A';
  TheData[1,1,2] := 'B';
  TheData[1,2,1] := 'C';
  TheData[1,2,2] := 'D';
  TheData[1,3,1] := 'E';
  TheData[1,3,2] := 'F';
  TheData[2,1,1] := 'G';
  TheData[2,1,2] := 'H';
  TheData[2,2,1] := 'I';
  TheData[2,2,2] := 'J';
  TheData[2,3,1] := 'K';
  TheData[2,3,2] := 'L';
  for i := 1 to 2 do
   begin
     for j := 1 to 3 do
       begin
         for k := 1 to 2 do writeln(TheData[i,j,k]);
       end;
   end;
  readln; 
end.

You can download the complete code here.

Monday 24 May 2010

N-Dimensional Array

N-dimensional array is an array that has two or more indexes. To understand the concept of n-dimensional array, see the picture below.

To declare two-dimensional array that can hold six character, we can us this statement :

Type

    TwoDimensionalArray = array[1..2, 1..3] of char;

Var

    TheData : TwoDimensionalArray;

Or you can use this statement :

Var

    TheData : array[1..2, 1..3] of char;

To access an element in two-dimensional array use this syntax :

ArrayVariableName[ArrayIndex1,ArrayIndex2];

Example :

TheData[1,3] := ‘A’;

Writeln(TheData[1,3]);

Readln(TheData[1,3]);

Example program :

program Project1;
{$APPTYPE CONSOLE}
uses
   SysUtils;
var
   i, j : integer;
   TheData : array[1..2, 1..3] of char;
begin
   //assigning values to array
   TheData[1,1] := 'A';
   TheData[1,2] := 'B';
   TheData[1,3] := 'C';
   TheData[2,1] := 'D';
   TheData[2,2] := 'E';
   TheData[2,3] := 'F';
   for i := 1 to 2 do
    begin
      for j := 1 to 3 do writeln(TheData[i,j]);
    end;
   readln;
end.

You can download the complete code here.

How to declare a three-dimensional array and to use it in a program ?

Sunday 23 May 2010

Array Data Type

Array is a structured data type that can hold some data which has same data type. Every element in an array has an index and it can be individually accessed. In Pascal, we can have one-dimensional array or n-dimensional array.

To declare one-dimensional array that can hold six character, we can us this statement :

Type

    OneDimensionalArray = array[1..6] of char;

Var

    TheData : OneDimensionalArray;

Or you can use this statement :


Var

    TheData : array[1..6] of char;

The statement above declares an array that can hold six elements. It is called static array, because it has a fix amount of data. While a dynamic array does not have a fix amount of data.

To access an element in an array use this syntax :

ArrayVariableName[ArrayIndex];

Example :

TheData[3] := ‘A’;

Writeln(TheData[3]);

Readln(TheData[3]);

Example program :

program Project1;
{$APPTYPE CONSOLE}
uses
   SysUtils;
var
   i : integer;
   TheData : array[1..5] of char;
begin
   //assigning values to array
   TheData[1] := 'A';
   TheData[2] := 'B';
   TheData[3] := 'C';
   TheData[4] := 'D';
   TheData[5] := 'E';
   for i := 1 to 5 do writeln(TheData[i]);
   readln;
end.

You can download the complete code here.

Thursday 20 May 2010

Creating Web Photo Gallery using Photoshop

It is quite simple to create a web photo gallery. Before we start creating a web photo gallery, first you have to group all picture you are going to use in your photo gallery into a folder / directory. Then you also need to prepare a folder / directory as a destination of your photo gallery.

After you run Adobe Photoshop, choose File – Automate – Web Photo Gallery. See the picture below :

A dialog box will appear. Choose the style of your photo gallery ( in this case I use simple style ) and the extension of your index file ( htm or html ). Define the directories or folders of your source images / pictures and the destination folder. In this case, I group all images / pictures in folder : D:\Fujiyama and the destination folder is D:\MyWebPhotoGallery. See the picture below :

Press OK and relax while Adobe Photoshop is processing your images / pictures. After processing, you will get some folders and files as the result in the destination folder.

Now, you ready to upload all the files to your web server.

Download pictures and web photo gallery here


Wednesday 19 May 2010

Break and Continue Statement ( Delphi Tutorial # 14 )

Break

Break is a procedure to jump out or quit the looping statement (if, repeat or while). Break is usually called in an if statement.

Example :

program Project1;
{$APPTYPE CONSOLE}
uses
  SysUtils;

var
  number, stop : integer;
begin
  write('Conter will be stopped at : ');
  readln(stop);
  for number := 1 to 1000 do
    begin
      if number = stop +1 then break;
      writeln(number);
    end;
  readln;
end.

Continue

Continue is a procedure that is used for skipping to next iteration in a looping statement (if, repeat or while). It is also called in an if statement.

Example 1 (writing odd numbers from 1 to 20) :

program Project1;
{$APPTYPE CONSOLE}
uses
  SysUtils;

var
  number : integer;
begin
  for number := 1 to 20 do
    begin
      if Odd(number) then continue;
      writeln(number);
    end;
  readln;
end.

Example 2 (writing even numbers from 1 to 20) :

program Project1;
{$APPTYPE CONSOLE}
uses
  SysUtils;

var
  number : integer;
begin
  for number := 1 to 20 do
    begin
      if not Odd(number) then continue;
      writeln(number);
    end;
  readln;
end.

You can download the complete code here.

Go to Previous Tutorial or Next Tutorial

Tuesday 18 May 2010

While Statement in Delphi ( Delphi Tutorial # 13 )

The syntax of while statement is :

  while boolean expression do

    begin

      first statement

      .

      .

      last statement

    end;

If the boolean expression is true, the statements will be executed until the boolean expression is false.

Example 1 ( writing numbers from 1 to 10 ) :

program Project1;

{$APPTYPE CONSOLE}

uses

  SysUtils;

var

 number : integer;

begin

 number := 1;

 while number  <  11 do

  begin

   writeln(number);

   number := number + 1;

  end;

 readln;

end.


Example 2 ( adding numbers from 1 to 100 ) :

program Project1;

{$APPTYPE CONSOLE}

uses

  SysUtils;

var

 number, sum : integer;

begin

 number := 1;

 sum := 0;

 while number   <  101  

  begin

   sum := sum + number;

   number := number + 1;

  end;

 writeln(sum);

 readln;

end.


Example 3 ( adding odd numbers from 1 to 10 ) :program Project1;

program Project1;

{$APPTYPE CONSOLE}

uses

  SysUtils;

var

 number, sum : integer;

begin

 number := 1;

 sum := 0;

 while number   <  101

  begin

   if Odd(number) then sum := sum + number;

   number := number + 1;

  end;

 writeln(sum);

 readln;

end.


Example 4 ( adding even numbers from 1 to 100 ) :

program Project1;

{$APPTYPE CONSOLE}

uses

  SysUtils;

var

 number, sum : integer;

begin

 number := 1;

 sum := 0;

 while number   <  101

  begin

   if not Odd(number) then sum := sum + number;

   number := number + 1;

  end;

 writeln(sum);

 readln;

end.


You can download the complete code here.

Go to Previous Tutorial or Next Tutorial

Sunday 16 May 2010

Repeat Statement in Delphi ( Delphi Tutorial # 12 )

The syntax of repeat statement is :

  repeat

    first statement

    .

    .

    last statement

  until boolean expression

The first statement until the last statement will be executed once. If the boolean expression is false, all statements will be executed again until the boolean expression is true.

Example 1 ( writing numbers from 1 to 10 ) :

program Project1;
{$APPTYPE CONSOLE}
uses
   SysUtils;

var
  number : integer;
begin
  number := 1;
  repeat
   writeln(number);
   number := number + 1;
  until number = 11;
  readln;
end.

Example 2 ( adding numbers from 1 to 100 ) :

program Project1;
{$APPTYPE CONSOLE}
uses
   SysUtils;

var
  number, sum : integer;
begin
  number := 1;
  sum := 0;
  repeat
   sum := sum + number;
   number := number + 1;
  until number = 101;
  writeln(sum);
  readln;
end.

Example 3 ( adding odd numbers from 1 to 10 ) :

program Project1;
{$APPTYPE CONSOLE}
uses
   SysUtils;

var
  number, sum : integer;
begin
  number := 1;
  sum := 0;
  repeat
   if Odd(number) then sum := sum + number;
   number := number + 1;
  until number = 101;
  writeln(sum);
  readln;
end.

Example 4 ( adding even numbers from 1 to 100 ) :

program Project1;
{$APPTYPE CONSOLE}
uses
   SysUtils;

var
  number, sum : integer;
begin
  number := 1;
  sum := 0;
  repeat
   if not Odd(number) then sum := sum + number;
   number := number + 1;
  until number = 101;
  writeln(sum);
  readln;
end.

You can download the complete code here.

Go to Previous Tutorial or Next Tutorial

Looping Statement in Delphi ( Delphi Tutorial # 11 )

Looping statement is used for repeating a process. For example, if we want to write numbers from 1 to 100, we can use looping statement instead of writing a hundreds statements. In Pascal, there are three looping statements :

-         for  statement

-         repeat  statement

-         while statement

We have break statement and continue statement related to repetition process.

For statement

The syntax of for statement :

-         for counter :=  first value to last value do

-         for counter :=  first value downto last value do

Counter is an ordinal type variable (see Delphi Tutorial # 3 : Identifier and Data Type). First value and last value are expressions which data type is the same as counter’s data type. Counter’s value will change from the first value to the last value. And in every step of counter, the statement will be executed.

Example 1 :

program Project1;
{$APPTYPE CONSOLE}
uses
  SysUtils;

var
  number : integer;
  letter : char;
begin
  for number:=1 to 5 do
   writeln(number);
  for letter:='A' to 'E' do
   writeln(letter);
  for number:=5 downto 1 do
   writeln(number);
  for letter:='E' downto 'A' do
   writeln(letter);
  readln;
end.

Example 2 (adding numbers between 1 to 100) :

program Project1;
{$APPTYPE CONSOLE}
uses
  SysUtils; 

var
  i, sum : integer;
begin
  sum := 0;
  for i:=1 to 100 do
   begin
    sum := sum + i;
   end;
 writeln(sum);
 readln;
end.

Example 3 (adding odd numbers between 1 to 100) :

program Project1;
{$APPTYPE CONSOLE}
uses
  SysUtils;

var
  i, sum : integer;
begin
  sum := 0;
  for i:=1 to 100 do
   begin
    if Odd(i) then
     sum := sum + i;
   end;
  writeln(sum);
  readln;
end.

Example 4 (adding even numbers between 1 to 100) :

program Project1;
{$APPTYPE CONSOLE}
uses
  SysUtils;

var
  i, sum : integer;
begin
  sum := 0;
  for i:=1 to 100 do
   begin
     if not Odd(i) then
       sum := sum + i;
   end;
  writeln(sum);
  readln;
end.

You can download the complete code here

Go to Previous Tutorial or Next Tutorial

Multiple Conditional Statements in Delphi ( Delphi Tutorial # 10 )

You can use if statement for multiple conditional statement but it will be little bit messy.

For example :

program multiple_cond_if;
{$APPTYPE CONSOLE}
uses
 SysUtils;

var
 mark : integer;
begin
 write('Your mark : ');
 readln(mark);
 write('Your grade is ');
 if mark >= 90 then
  writeln('A')
 else
  if mark >= 70 then
   writeln('B')
  else
   if mark >= 60 then
    writeln('C')
   else
    if mark >= 40 then
     writeln('D')
    else
     writeln('E');
 readln;
end.

Instead of using if … then statement, it will be easier using case … of statement :

program multiple_cond_case;
{$APPTYPE CONSOLE}
uses
 SysUtils;

var
 mark : integer;
begin
 write('Your mark : ');
 readln(mark);
 write('Your grade is ');
 case mark of
  0..39   : writeln('E');
  40..59  : writeln('D');
  60..69  : writeln('C');
  70..89  : writeln('B');
  90..100 : writeln('A');
 end;
readln;
end.

Download the complete code here.

Go to Previous Tutorial or Next Tutorial

Thursday 13 May 2010

Using DLL file in Delphi

After we created a DLL file in the previous tutorial, now we’re going to use this DLL file in an application. First, you have to create a user interface like picture below :

Or you can download this project here.

Before you write some codes in this project, you have to make sure that the DLL file you’re going to use and your project are in the same directory (folder). Or you can put the DLL file you’re going to use in directory : c:\windows\system.

To use functions in a DLL file we’ve created, you must type the function after {$R *.DFM}

{$R *.DFM}
{ place functions from DLL here }
function area(length, width : integer): integer; stdcall; external 'area_volume.dll';
function volume(length, width, height : integer): integer; stdcall; external 'area_volume.dll';

external clause means that the functions we use (area and volume) are in an external file (area_volume.dll)

To call area function and volume function see the codes below :

procedure TForm1.CalculateAreaButtonClick(Sender: TObject);
var
  L, W : integer;
begin
  L := StrToInt(Edit1.Text);
  W := StrToInt(Edit2.Text);
  Label8.Caption := Label8.Caption + ' ' + IntToStr(area(L,W));
end;

procedure TForm1.CalculateVolumeButtonClick(Sender: TObject);
var
  L, W, H : integer;
begin
  L := StrToInt(Edit3.Text);
  W := StrToInt(Edit4.Text);
  H := StrToInt(Edit5.Text);
  Label9.Caption := Label9.Caption + ' ' + IntToStr(volume(L,W,H));
end;

area(L,W) and volume(L,W,H) will return integer type values, so if you want to put these values into label.caption, you have to convert them into string using IntToStr() procedure.

You can download the complete code here.


if Statement in Delphi ( Delphi Tutorial # 9 )

There are two kinds of conditional statement : if statement and case statement. This both statements are for making decisions that involve two or more alternative choices or conditions.

In this tutorial, we will learn about if statement. There are two kinds of if statement :

-         if ….. then

-         if ….. then …. else

The syntax of if …. then statement is :

     If boolean expression then statement;

Boolean expression can be true or false. If it is true, computer will execute the statement. If it is false, computer will not execute the statement.

The syntax of if …. then …. else statement is :

     If boolean expression then first_statement else second_statement;

If boolean expression is true, computer will execute the first statement. If it is false, computer will execute the second statement.

The flowchart of if statement is below :

Example for if …. then statement :


program Project1;

{$APPTYPE CONSOLE}

uses SysUtils;

var

 score : integer;

begin

  write('Your score : ');

  readln(score);

  if score < 60 then writeln('You did not pass the exam');

  if score >= 60 then writeln('You passed the exam');

  readln;

end.


Example for if …. then …. else statement :


program Project2;

{$APPTYPE CONSOLE}

uses

  SysUtils;

var

 score : integer;

begin

  write('Your score : ');

  readln(score);

  if score < 60 then

    writeln('You did not pass the exam')

   else

    writeln('You passed the exam');

  readln;

end.


Both projects above will give you the same result.

Go to Previous Tutorial or Next Tutorial

Tuesday 11 May 2010

Creating DLL file using Delphi

There are two kinds of  executable file in Windows, EXE file and DLL file. DLL (Dynamic Link Library) is an executable file with some procedures or functions in it. These procedures or functions can be used by some applications at the same time. Because, once DLL is loaded to memory, every program or application can use it. The other advantage of using DLL is our application becomes modular. It will be easier to change the application by replacing the DLL.

To create a DLL file, choose File – New – DLL. And you’ll get some codes below :


library Project1;

{ Important note about DLL memory management: ShareMem must be the first unit in your library's USES clause AND your project's (select Project-View Source) USES clause if your DLL exports any procedures or functions that pass strings as parameters or function results. This applies to all strings passed to and from your DLL--even those that are nested in records and classes. ShareMem is the interface unit to the BORLNDMM.DLL shared memory manager, which must be deployed along with your DLL. To avoid using BORLNDMM.DLL, pass string information using PChar or ShortString parameters. }

uses

  SysUtils,

  Classes;

{$R *.RES}

begin

end.


You can delete the unnecessary comment after library clause and add exports clause before begin….end block.

One thing you have to concern about is that all variables in DLL are private. Your application and DLL can not use the variables at the same time. You have to send values of the variables and receive a result.

Now we’re going to insert some functions into DLL :


library area_volume;

uses

  SysUtils,

  Classes;

{$R *.RES}

function area(length, width : integer): integer; stdcall;

begin

 area := length*width;

end;

function volume(length, width, height : integer): integer; stdcall;

begin

 volume := length*width*height;

end;

exports

 area, volume;

begin

end.


You can download this source code here.

Now save the project as area_volume.dpr. Remember that the project name and the DLL name have to be the same, in this case we name it area_volume. Then build the DLL file by choosing Project – Build … And you’ll get area_volume.dll file. Then you can create an application using this DLL.


Monday 10 May 2010

Square Root and Exponential Function in Delphi ( Delphi Tutorial # 8 )

Sqrt() function

In this tutorial we’re going to write some mathematic formulas in Delphi. The first formula is :

To write the above formula in Delphi, we use sqrt() function :

Sqrt((b*b-4*a*c)/(2*a))

Exp() function

There’s no power operator in Pascal Object. But it does not mean that we can not calculate the formula above. Before we calculate the formula, we have to describe it into an exponential function :

So we can write the formula using exp() function and ln() function :

                                                   Exp(b*ln(a))

Example :

program Project1;
{$APPTYPE CONSOLE}
uses
SysUtils;

var
x, y : real;
a, b, c : integer;

begin
  // Insert user code here
  a := 2;
  b := 5;
  c := 3;
  x := sqrt((b*b-4*a*c)/(2*a));
  writeln(x:0:1);
  y := exp(b*ln(a));
  writeln(y:0:0);
  readln;
end.

Go to Previous Tutorial or Next Tutorial

Wednesday 5 May 2010

Text Area Code Generator

In this first project, we're going to create an application that can generate HTML codes to create a text area. First you have to create a form like the picture below :

Now, write the codes for each event of the components :

When the first time we run the program, we set the default values of some component's properties. So we write some codes on FormActivate event of Form1 :

  procedure TForm1.FormActivate(Sender: TObject);
  begin
   Memo1.Text := '';
   Memo2.Text := '';
   Memo2.SetFocus;
   Edit1.Enabled := false;
   Edit2.Enabled := false;
   Edit3.Enabled := false;
   RadioButton1.Checked := true;
   RadioButton2.Checked := false;
   RadioGroup1.ItemIndex := 0;
   Edit4.Text := '1';
   Edit5.Text := '1';
  end;

The codes for RadioButtons ( Text Only and Link Codes ) :

  procedure TForm1.RadioButton1Click(Sender: TObject);
  begin
   Edit1.Enabled := false;
   Edit2.Enabled := false;
   Edit3.Enabled := false;
   Memo2.Enabled := true;
   Memo2.SetFocus;
  end;

  procedure TForm1.RadioButton2Click(Sender: TObject);
  begin
   Edit1.Enabled := true;
   Edit2.Enabled := true;
   Edit3.Enabled := true;
   Memo2.Enabled := false;
   Edit1.SetFocus;
  end;

We need to limit the input of rows and columns for numeric inputs only :

  procedure TForm1.Edit4KeyPress(Sender: TObject; var Key: Char);
  begin
   if not (key in ['0'..'9', #8]) then key := #0;
  end;

  procedure TForm1.Edit5KeyPress(Sender: TObject; var Key: Char);
  begin
   if not (key in ['0'..'9', #8]) then key := #0;
  end;


And the other codes for the events of the rest components are :


procedure TForm1.GenerateButtonClick(Sender: TObject);

var

 LinkBanner : string;

begin

 if RadioButton1.Checked then

  begin

   memo1.Text :='<p align="'+RadioGroup1.Items.String

                [RadioGroup1.ItemIndex]+'"><textarea name="code" rows="' + 

                Edit4.Text + '"  cols="' +Edit5.Text + '">' + memo2.Text  + 

                '</textarea></p>';                                  

  end else

  begin

   LinkBanner := '<a href="' + Edit2.Text +

                 '"target="_blank"><img src="'+Edit1.Text +

                 '" border="0" alt="' + Edit3.Text + '" /></a>';

   memo1.Text := RadioGroup1.Items.Strings[RadioGroup1.ItemIndex] + 

                 '"><textarea name="code" rows="' +           

                 Edit4.Text + '" cols="'+Edit5.Text + '">' + LinkBanner +

                 '</textarea></p>';

  end;

end;


procedure TForm1.ClearButtonClick(Sender: TObject);

begin
  memo1.Text := '';

end;


procedure TForm1.ExitButtonClick(Sender: TObject);
begin
  Application.Terminate;
end;

To see the complete codes you can download this project here.

Creating Text Area

What is text area ? You can see the example of text area below :

To create a text area, use this HTML tag :

<p align="center"><textarea name="code" rows="6" cols="20"> Your Text Here </textarea></p>

You can save some HTML codes that contain a link and a banner for link or banner exchange. So the codes can be copied and pasted into another web page. To create a text area with a link and a banner, use these HTML codes :

<a href="Link URL" target="_blank"><img src="Image URL " border="0" alt="Tutorial Blog" /></a>

Text Area Code Generator

You can also use Text Area Code Generator to create a text area.

Using this software, you don’t need to type the HTML code to create a text area. You can generate the code by clicking Generate HTML Codes button. Click here to download this software.

These links are part of a pay per click advertising program called Infolinks. Infolinks is an In Text advertising service; they take my text and create links within it. If you hover your mouse over these double underlined links, you will see a small dialog box containing an advertisement related to the text. You can choose to move the mouse away and go on with your browsing, or to click on the box and visit the relevant ad. Click here to learn more about Infolinks Double Underline Link Ads.